Purpose

This is a blog containing the build history of an experimental home built airplane. The RV-7A is a two place, piston powered, low wing, tractor configuration, tricycle gear, aluminum and composite aircraft. The original purpose of this blog was to document the construction of my experimental category aircraft in order to satisfy the build log requirement for the FAA. Now it's just for the amusement of friends and family as I document some of our aviation experiences. For more information on the RV series of aircraft see www.vansaircraft.com.

Sunday, January 27, 2013

Step 7.1, Bottom skins

Not really looking forward to this after the life threatening tedium of riveting the top skins.  I really shouldn't say things like that as it gives the impression that there is something else to do that would be more fun.  Sometimes it's hard to remember that you are having the time of you life when you are drilling out a rivet gone bad for the second time.  The truth is that all of it is better than not building an airplane, but some of the processes are more fun than others.


The real trick to doing the bottom skins is getting past the first part.  I guess that could be true with  just about any task.  Just beyond the procrastination lies the productivity.  I eventually got into it and discovered right off, that the area under the wing walk is a real bitch because of the closely spaced ribs.

To work the bottom skins by oneself, ideally, one would be equipped with the long arms of a basketball player and be crazy skinny too, like a vegetarian.  A second elbow joint in the center of your forearm wouldn't go unappreciated.  If you don't happen to have these attributes, it is best to  find a helper, preferably a woman, to help you.  You'll need very small hands to get between the ribs at the small end of the wing.

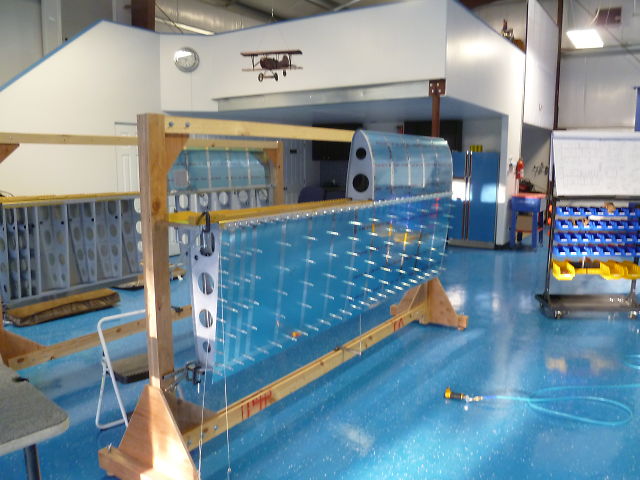
We elected to hang the skins while the wing remained on the stand, rather than placing the wing on a table as the manual suggests.  I just felt the my reach would be better if I didn't have to lean across the leading edge of the wing first.


Duct tape is employed along the way to hold the skin back.  Notice the little tray of rivets perched on the bottom of the stand.  Guess how far those little boogers go when you knock the tray off.  The answer is I don't know for sure because I haven't found them all yet.


So here I am finishing up the first bottom skin.  The next skin overlays the inboard skin as we work outward towards the tip.  But, since this is the left wing, the Pito tube must be installed first.

It's just a matter of getting the Pito mast through the hole we put in the skin earlier.  It's a tight fit and takes a little wiggling to get through.

With the mast in place we can continue on with the riveting of the skin.

The picture above was taken later showing the same area below the mast while I was trying to connect the Pito and AOA plumbing.  The inspection mirror becomes your best friend during the bottom skinning process as very little of the work is directly visible.


And so we continue to pound those rivets...


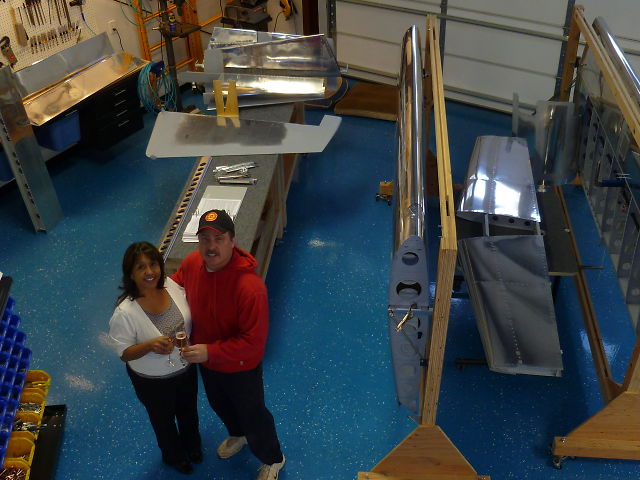
And eventually we move on to the right wing.


At the start of this post I mentioned the need for skinny arms.  The next picture illustrates the extent to which my arm can extend through the lower middle lightening hole.  About half way, which is kind of a problem because my favorite bucking bar only just reaches the furthest rivets in the lower part of the bay and very little pressure or control could be applied.  It was the wild west down there.


Well, along the way there were a few dents, and a few rivets had to be replaced but, perseverance pays and we eventually got through it.

One tool that is absolutely indispensable and, strangely, was not included in my tool kit was a sharp pointy thing.


The sharp pointy thing is used to bring the parts to be fastened into alignment prior to inserting the rivet.  Shown above, it's the unsung hero of aluminum aircraft construction.  Place the pick in to the hole above the one that won't accept the rivet.  This is usually enough to convince the hole in question to allow the rivet without further comment.  Occasionally the obstinate hole itself must be probed before it will allow the rivet in.  Don't feel sorry for the hole, it had it coming.

And finally, the last few rivets in the last bottom skin go in.  Whew!


Tuesday, January 8, 2013

Step 7.0 Ailerons

It turns out that the ailerons are a lot like the flaps in construction and size.  For those not familiar, the ailerons are located just outboard of the flaps and occupy about half of the trailing edge of the wing.  The purpose of the aileron is to provide a banking action to the aircraft which is helpful when it comes time to turn.  Although it is possible to turn an aircraft with the aileron or rudder alone, it really takes the combined action of the rudder and the ailerons to maintain coordinated flight through a turn.

The big difference in the construction of the ailerons vs. the flaps is that the ailerons use stiffeners internally rather than the rib construction that the flaps used.  Each aileron uses 16 stiffeners which is quite a lot considering that each one is individually cut from the Van's supplied angle stock.  Each stiffener has two tapered sides and two straight ends to cut.  That all means a lot of time in front of the band saw.  As always, the first step is to get the blue plastic off.


Match drilling the stiffeners to the skin.
Then deburred and dimpled, the stiffeners are ready for primer.


Then the rest of the aileron frame is assembled and match drilled.


Here's a tool I made to dimple the leading edge.  The standard dimple die is too large in diameter to fit inside the curved leading edge.  I drilled and counter sunk a 1/2" piece of bar stock to make a female die that can fit inside the leading edge.  A larger diameter bar would have been better, but 1/2" is what I had on hand.  


With the female die inside the leading edge, a nail fits through the back of the die then through the leading edge where it meets the the male half of a pull rivet based dimpler.


And the dimpled leading edge.


Here's the first 16 stiffeners in the paint booth. Lots of steps were performed, but not pictured, to get to this point. They are mostly omitted here so as not to induce a reader coma this early in the posting. You can thank me later.


After the primed stiffeners are riveted to the skin it's time to bend the skin down.  When the skin reaches the correct angle, the top and bottom just fit over the spar.  The last time we saw this homemade bending brake was for bending the elevator skins.  I'm sure glad I didn't throw it away.


So here is the counter balance weight that will be riveted to the inside of the leading edge.  This thing is heavy!   It is basically just a big pipe similar to galvanized water pipe.  The purpose of a counter balance is to dampen the tendency of a control surface to flutter.  Aerodynamic flutter can, in an extreme case, rip the control surface right off the airplane in a matter of seconds.  Midair disintegration of an aircraft is very rare, but when it does happen flutter is often suspected.


Let's take a break from building to watch Carol using the iPad to fix the Dish satellite reception.  Isn't technology great!  Notice the coat though.  She's arctic ready.


Now take a look at the actual temperature in the shop taken at the time of the photo above:


Out of the paint booth and the parts are ready for riveting.


And here is the right aileron finished.  Well almost finished.  I still had the hinge brackets to bolt on after this photo was taken.


Tuesday, January 1, 2013

Year 1 Retrospective

Time flies.  Hopefully, so will my airplane in a few more years.  But where is the project now that exactly one year has elapsed?  Well, the empennage is mostly done.  There are still a few minor details to do, but it is virtually complete.  There is also the small matter of completing the wings which most people consider to be essential to the flying experience.  On the wings, I estimate they are over 90% complete with the ailerons in progress and only the bottom skins left to attach.


Since nearly all of my money has gone into the airplane, the production value of this blog has obviously suffered.  So I'll need to ask for one more indulgence from the reader. At this point I ask that you create a virtual musical montage in your head.  It is with an overpowering sense of nostalgia and with great sentimentality that you should now flip through the following photos to the tune of the Carpenter's "We've only just begun."  In order to receive the full emotional impact I'll further suggest that the reader mentally dissolve between the photos as you go.  Cue music...

So it was about 1 year ago when these boxes showed up on my porch.   


And about one week after project start the first rivet was set.


Horizontal stabilizer test flight

Our latest addition: Puppy Trina

Dimple master


Pope of all aviation?


Chuck at work


Chuck admires his work on the EAA work benches

Melanie visits

Wings arrive


flute, flute, flute...


Prime

Drilled finger: RV rite of passage


Dogs at play


Fuel tanks hold air

Pito tube

If you're still in the musical montage, snap out of it now and dry your eyes before somebody sees you!  

...And so after exactly one year here we are.  Everything we've done so far is pictured below.  Two flaps, two elevators, a vertical stabilizer, a horizontal stabilizer, and a rudder. Two wings and two ailerons are in progress.  

We raise our glasses on the first anniversary of this project and to our good fortune. We wish you the same in 2013.